Social Live Video Auto Embed for WordPress
Automatically embed live videos of your Facebook Account/Page/Group on your WordPress site whenever your Facebook Account/Page/Group goes live on Facebook. The plugin detects if your Facebook Account/Page/Group is currently live and embeds the live video automatically. Also has the ability to embed previously recorded live videos and uploaded videos. Also has ability to configure a Site Wide Top Notification Bar to be displayed whenever your Facebook Account/Page/Group goes live. This plugin can be used for your Facebook User account or Facebook Pages you own or public Facebook Groups you are an admin of.
100% Self hosted, Independent
No dependency on any external server. You get the full code in your website.
100% Secure
No authorization of any external Fb app. You create your own app and use it.
One time payment, lifetime updates
No recurring billing required. Get lifetime updates after one time payment.
Premium Technical Support
Our qualified technical support is always ready to help you out in case of any issues.
Continuously Progressing
New premium features are released with each new update. You get them all for free.
Best Seller
This is the best selling WordPress plugin for integration with Facebook live.
Features:
- Ability to create Embed codes (WordPress shortcode call) for your Facebook Account/Page/Group. Use the embed code anywhere in content of your website (posts, pages etc). Whenever you go live on your account/page/group, the live video will automatically get embedded in the content where the code is placed.
- Ability to create Embed codes for previously recorded live videos of your Facebook Account/Page/Group. Use the embed code anywhere in content of your website (posts, pages etc). Recent live videos of your Facebook Account/Page/Group will be embedded in the content where the code is placed.
- Ability to create Embed code for uploaded videos of your Facebook Account/Page/Group. Use the embed code anywhere in content of your website (posts, pages etc). Uploaded videos of your Facebook Account/Page/Group will be embedded in the content where the code is placed.
- Ability to enter Max Number of Videos to be embedded. There is no limit.
- Ability to enter custom message for visitors to be displayed above the video player.
- Ability to enter custom alternate message to communicate with visitors when your Facebook Account/Page/Group is not live.
- Ability to enter custom alternate message to communicate with visitors when no recent live video is available.
- Ability to use WordPress Shortcodes in Alternate Message and Top Message.
- Ability to enter custom width of the video player.
- Responsive out of the box.
- Ability to show full Facebook post (video description and buttons for like/comment/share) attached to the video player. This feature is Desktop Only, Facebook has disabled it for mobile devices.
- Ability to allow/ disallow Fullscreen mode (for recorded videos and uploaded videos only).
- Ability to cache the recorded videos and uploaded videos, and set cache refresh time. This is useful for reducing server load and number of API requests.
- Ability to use same embed code at multiple places on your website.
- Ability to use multiple embed codes within single post/page of WordPress.
- Ability to configure a Site Wide Top Notification Bar to be displayed when your Facebook Account/Page/Group goes live.
- Notification bar is AJAX based. So it appears automatically on an opened page of the website without the need of refreshing it.
- Ability to customize the look of Notification Bar.
- Ability to make the Notification Bar sticky.
- Ability to add blinking effect to Notification bar.
Hosting Requirements
PHP VERSION
– Facebook API requires PHP version 5.4 or later.
SSL(https)
– New Facebook apps REQUIRE SSL for Facebook Login to work . So your website must be on https.
Download Link
Installation Guide
Step by step installation guide.
Step 1: Getting Facebook App ID and App Secret
1. We must get Facebook App ID and App Secret in order to use the plugin as it is a necessity to use Facebook API. Firstly, please go to facebook website and login to your Facebook account. (There is no harm in using personal facebook account)
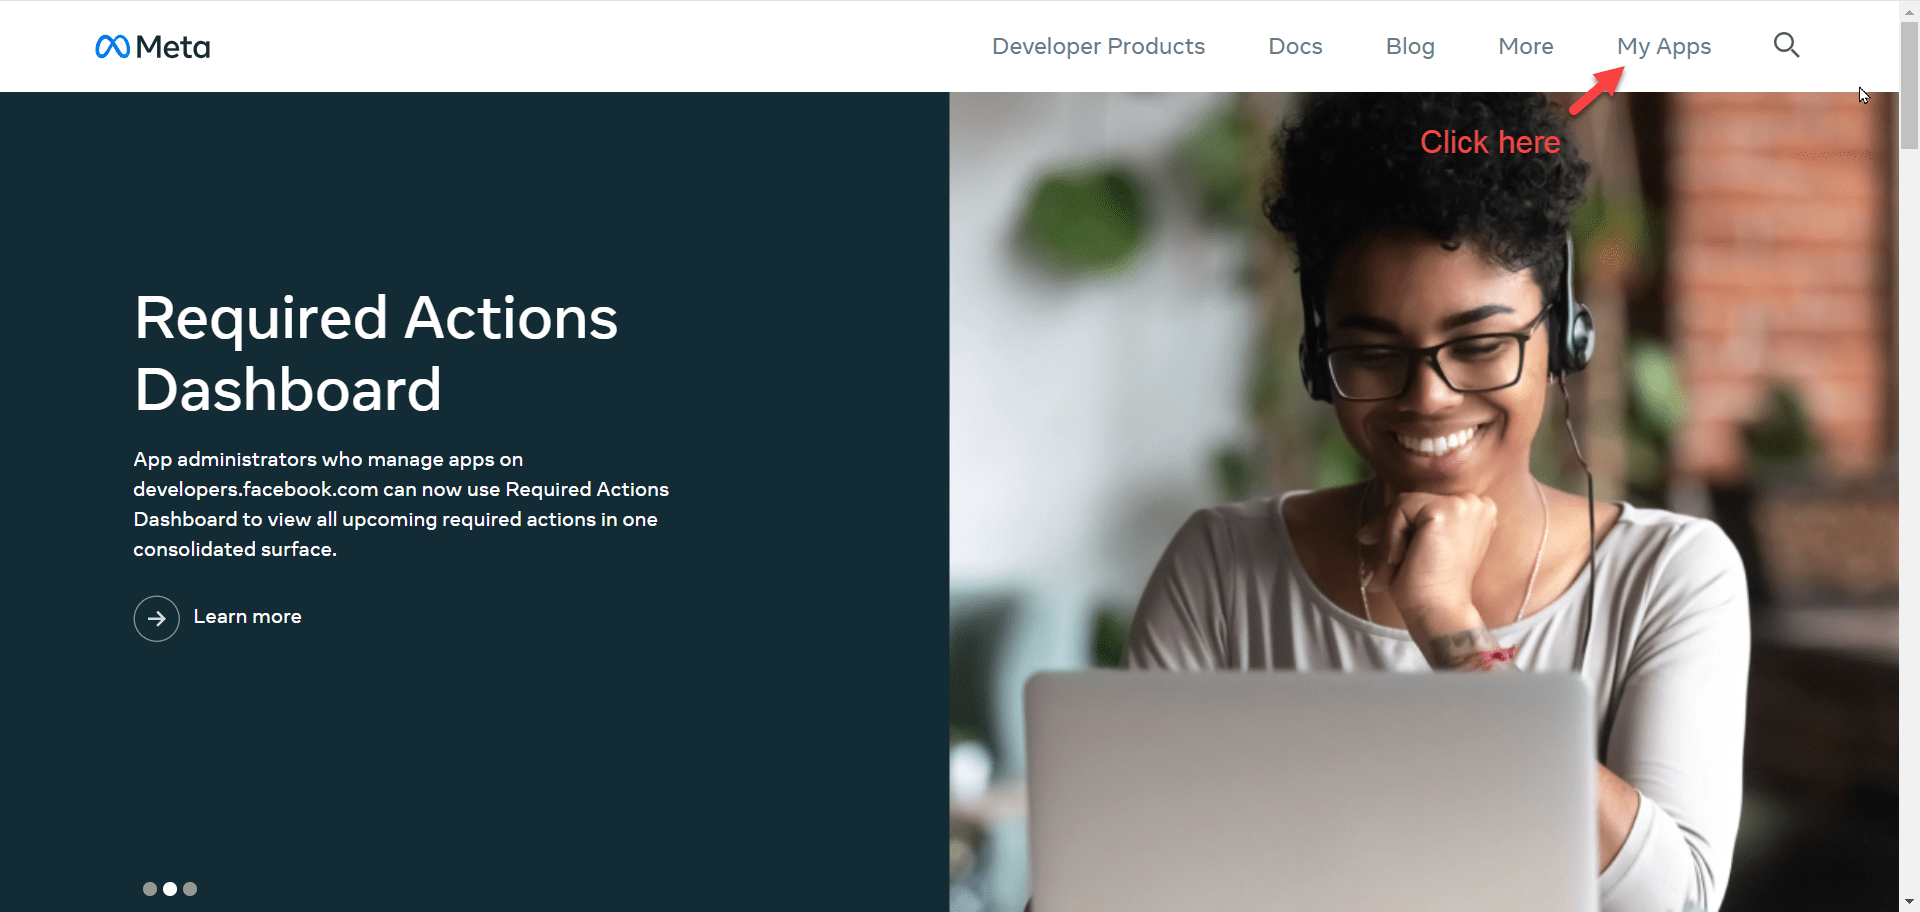
2. Now go to the Developers page: https://developers.facebook.com/
3. Click the “My App” button as shown in the following image
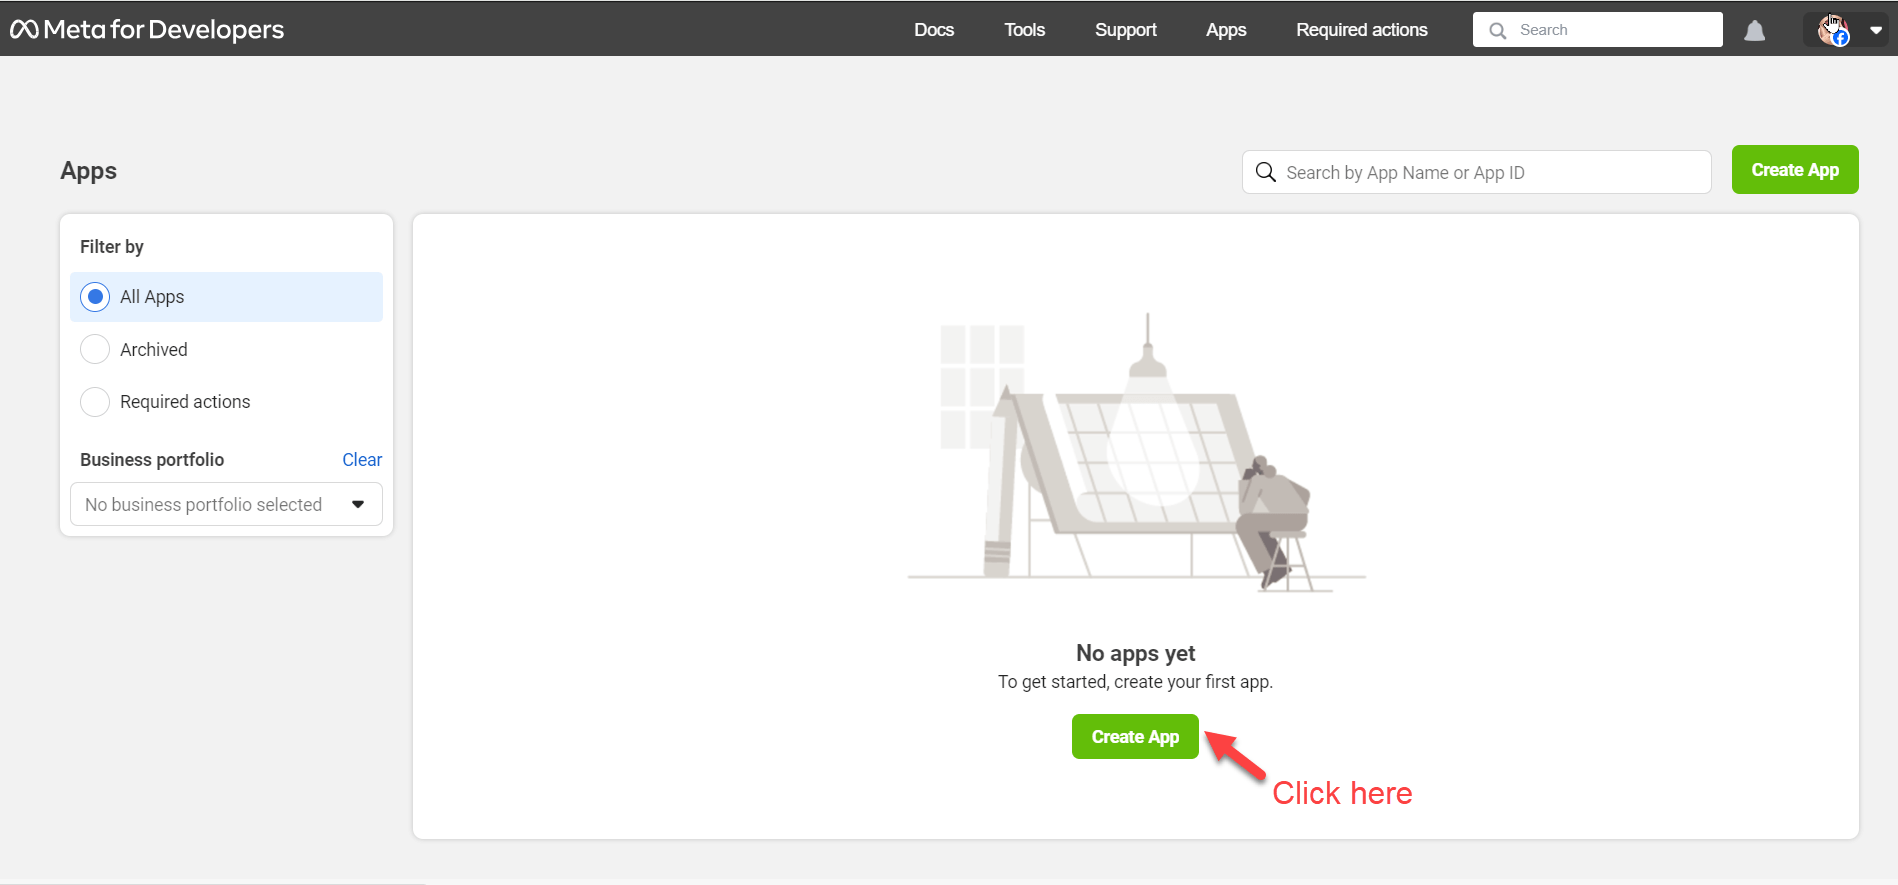
4. First create the new app.
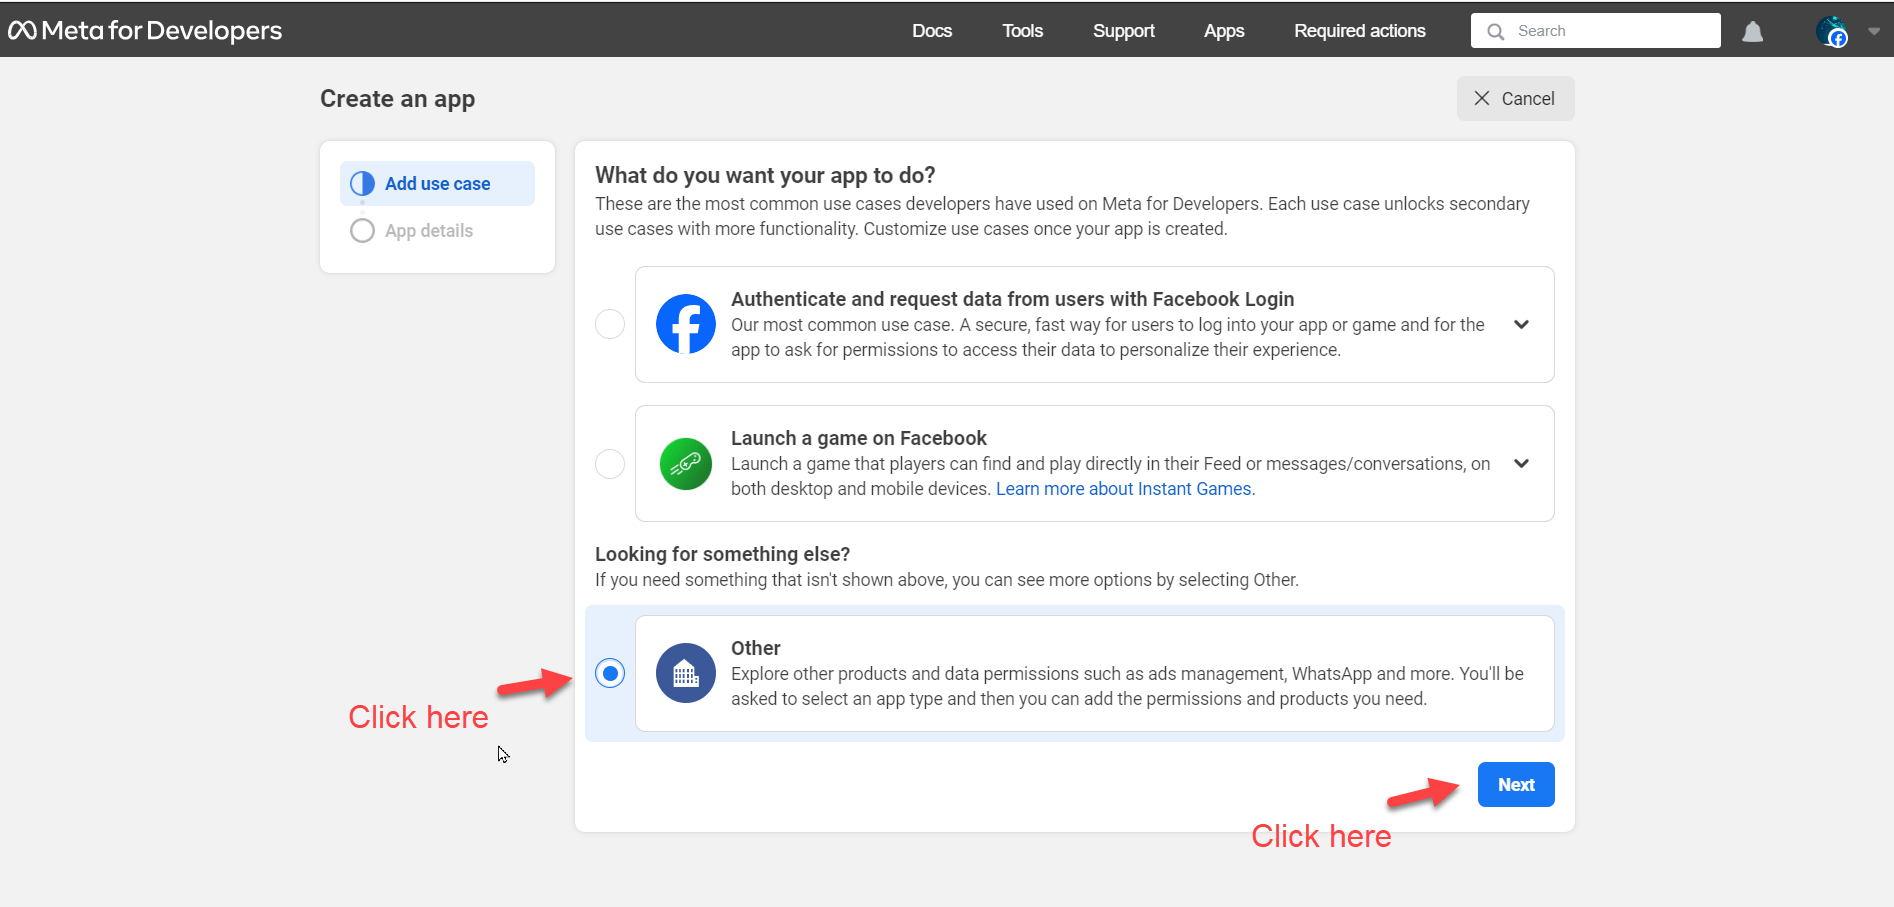
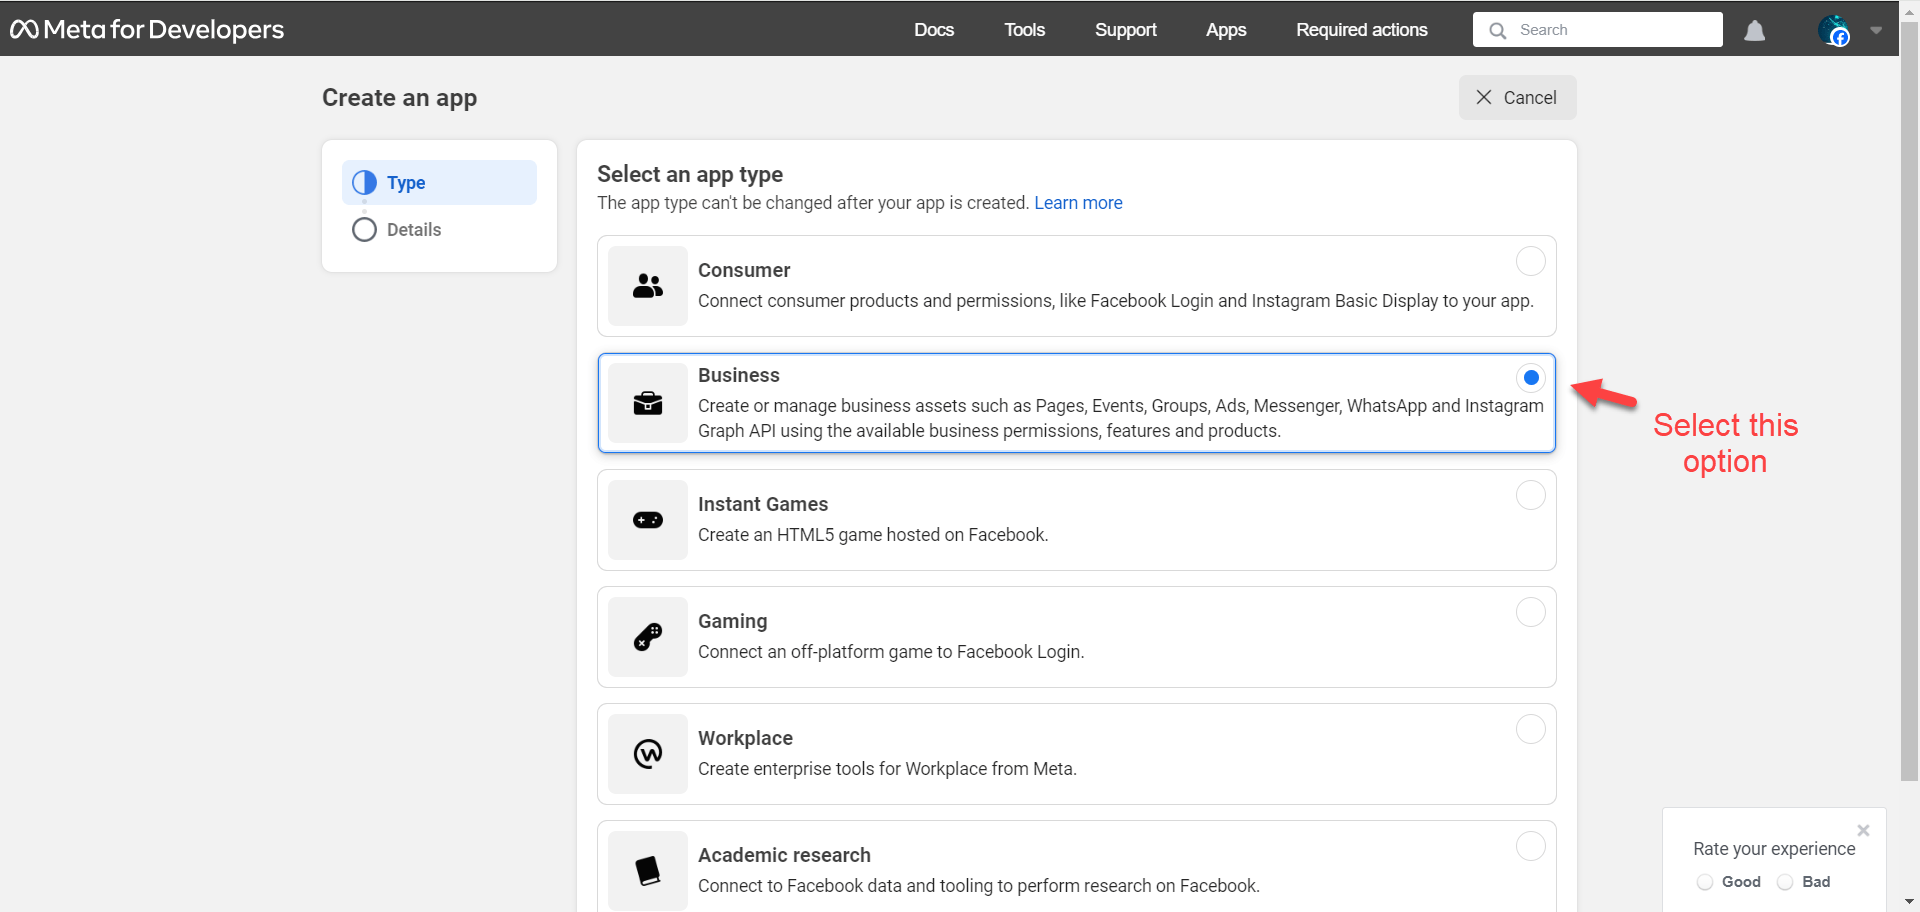
5. After clicking Create App, select “Other” then Select “Business”
6. Enter app info and click Create app.

7. On the App Dashboard, click “Setup” under Facebook Login for Business.

8. Change “Login with the Javascript SDK” to Yes and enter the domain of your website. Then click Save Changes.

9. Go to App Settings > Basic and click Add Platform.

10.You will see a screen similar to the following . Please select your platform (website) and click “Next” button

11. Enter Site URL and click Save changes.

12.Now please click the “Show” button inside App Secret field in order to reveal App Secret as shown in the following image.

13 Note the App ID and App Secret and enter it on the plugin settings page.

14.Note: Since only the admin of the app (i.e. you) are going to login using this Facebook App there is no need to make your Facebook app live. Please keep it in Development mode

15. Now the facebook part is done. We will move to the next step now i.e. installing the plugin and configuring it.
Step 2: Installing the Plugin and Configuring it
- Extract the plugin Zip file and copy the extracted folder to wp-content/plugins of your WordPress installation.
- Login to WordPress Admin section and go to the plugins section.
- Find the plugin “Social Live Video Auto Embed” and click “Activate” as in the following image:

4.Once the plugin is activated, a new menu item “Social Live Video Auto Embed” will appear. Please click it as shown in the following image:

5.Once you have completed License Verification, please go to the Settings page of the plugin. Please enter the App ID and App Secret (which were noted in the previous step) in the relevant fields and click “Submit”.

6. You will see a screen similar to the one in the following image. Now please click the “Log in to Facebook” button to connect the plugin with your Facebook account.

7. You will see a Facebook login box now. Please login with your Facebook account.
The Facebook account used here for login must be the same account which created the Facebook App in Step 1 of this guide. If a different Facebook account must be used then add that account as an Administrator in the Facebook App at facebook developers
After logging in, you will see a screen similar to the following image. Please click “Continue as” button and grant permissions.

8.After continuing with your facebook account you will see the following screen. Please select your account which you want to use with your app. Now click “Next”.

9.The following screen will appear, now make sure that all permissions are granted. Then click on “Done”. (This is absolutely safe because you are only granting permission to your own app which you created in Step 1 of this guide)

10. You have successfully linked your Facebook account with the plugin. Now click “OK”.

11.You will see a screen similar to the following. Which means that you have successfully connected the plugin with your Facebook account. The access token usually expires in 60 days. In order to keep things working correctly, please make sure the access token is renewed before it gets expired. The plugin will create a notification in the Admin section when less than 7 days are remaining in access token expiry or if the access token becomes invalid due to any reason.

12.That’s it! You have completed the installation and configuring of the plugin. You can now start using the plugin. Please continue with the User Guide below to understand the usage of the plugin.
User Guide
Configure Embed codes and use them in your WordPress content (posts, pages etc) by following the guide below.
1. Click the “Create New Embed Code” menu item which is present under “Social Live Videos Auto Embed”. You will see the following form:

2. The first field is the Source of your video. You can select “A Facebook Page I Own”.
You will have to enter the Username of the Facebook Page. Please see the following image to know where to find the Username of a Facebook Page.

3. Please enter other fields of the form based on how you want the embed code to work.
For this example we select “A Facebook Page I Own” and enter other details.

4. In this example we have selected “Recent Live Videos (Recorded)” which means that the embed code will embed recent live videos of the page. Now please click “Submit”, you will see a success message if all the required fields have been filled correctly. Please select Yes against the “Use Cache” field. Change the value of “Cache Refresh Time” to a higher value (100 – 300) if you expect good traffic on your website. This will make sure there are minimum API requests and the Facebook App does not hit its API request limit.

5. Now please click the “Embed Codes List” menu item under “Social Live Videos Auto Embed”.

6.It will display a table and you will see your newly added embed code configuration there. Please copy the embed code as shown in the following image:

7. Now create a new post/page and enter the copied code in the content as shown in the following image:

8. Publish the post/page and view it . You will see recently recorded live videos embedded inside your post/page according to the configuration you selected.

9. Now we create another Embed code. This time we select “Currently Live Video” in the Video Type field. I have again selected “A Facebook Page I Own” as Source and entered the same Facebook Page Username, you can do as you wish.

10. Now we go to the Embed Codes List page. There is a new record there. We copy its embed code.

11. Now I go back to the same post I created for the first embed code, you can use a new post/page as you want. I add the new code in the content and update the post.

12. Now I view the post. It is showing the recorded videos but above them it is showing the message which I entered in the second embed code configuration as Alternate message. This means that the Facebook page is not currently live. If the page was currently live it would embed the live video there. You can experiment by setting up embed code for your Facebook Page and then going live on Facebook and seeing the result on your WordPress website.

13. In order to configure Site Wide Notification Bar, click the “Site Wide Notification” menu item which is present under “Social Live Videos Auto Embed”. The first field is the Source of your video . You can select “A Facebook Page I Own”.
– Once you select “A Facebook Page I Own” then you will have to enter the Username of the Facebook Page . Please see the following image to know where to find the Username of a Facebook Page.

14. Set options as you want then click submit. If you have entered everything correctly, you will see a screen similar to the following

15.Once you have configured the Site Wide Notification Bar for your Facebook Page, a Notification Bar will appear on your WordPress website whenever your Facebook Page goes live. The Notification Bar’s appearance will depend upon your configuration, it will appear like this:

16.The Notification Bar is AJAX based which means that it appears automatically without the need of refreshing the page. Once the Source goes live, it can take 1-75 seconds for the Notification Bar to appear on the website. The Notification Bar will be clickable and will navigate the user to the link entered in the configuration. Users can also click the close button to close the Notification Bar. Once a user closes the bar, it will not appear to them for 15 minutes.
How to find Facebook Page Username?
Please see the following image to know where to find the Username of a Facebook Page.
Why you should buy Social Live Video Auto Embed?
100% Self hosted, Independent:
No dependency on any external server at. You get the full code on your website.
100% Secure:
No authorization of any external Facebook app to access your data. You create your own app and use it.
One time payment, lifetime updates:
No recurring billing required . Get lifetime free updates after one time payment.
Premium Technical Support:
Our qualified technical support is always ready to help you out in case of any issues.
Continuously Progressing:
New premium features are released with each new update. You get them all for free .
Best Seller:
This is the best selling WordPress plugin for integration with Social Live.